Sunday, October 31, 2010

Kitchen Gadget love

I love Kitchen gadgets and appliances. I really really want one of these: 


         (via)

A Kitchen torch. I want one. Bad. I have no real reason for one. I can think of about 2 recipes that I would use it on. But I want it. Think of all the possibilities! Toasted marshmallow cupcakes! Last time I used the broiler in the oven and it took foooorevveeer.  I could make creme brulee! I could makes mini fires all over the house!

I have this mixer and I love it! 


How did I mix things before I had this? 

I have a monster of a Caste Iron Skillet that I plan on doing a post about later that I love. I love Caste Iron. Get some! It's the best to bake in. 

I think these Matroyshka Measuring cups are so freakin' cute!


Anthropologie used to sell them but not anymore:( Some places sell white plastic Matroyshkas measuring cups but I just don't like those as much as the ceramic ones. I also really love ceramic measuring spoons but I would probably break those... P.S. Anthropologie has tons of adorable measuring cups and other cute kitchen things! 

My dad bought these measuring spoons for me the other day and I love them! 


These aren't your regular measuring spoons. 

The smallest measurement is a drop, the next size is a smidgen. Well I don't know about you but I had no idea how big a smidgen was until now. 


Next we have a pinch and a dash. Honestly I thought a pinch was the size of what a drop is and a dash was what a smidgen is. Who knew that I was wrong this whole time.


Last but not least, we have a tad. Ok and honestly, again, I kind of  always thought that they were all the same amount. BUT I WAS WRONG. Good to be informed. (edit: fyi, a tad measures approximately 1/2 of a teaspoon)


Check out Amazons selection, and pick up some today!

Friday, October 29, 2010

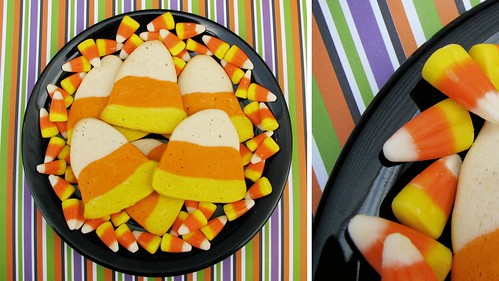
Candy Corn Sugar Cookies

Tomorrow is National Candy Corn Day! Or so, that's what the internet says. Confession though, I do not like candy corn.

There, I said it. Candy corn lovers, shun me now. I do, however, think candy corn is super cute, so I decided to celebrate the holiday in another way; with cookies.


Candy Corn Sugar Cookies
Recipe adapted from here
Yields 4 dozen cookies

2 cups of powdered sugar
2 cups of butter, room temperature
1 tsp. vanilla 
5 cups of flour
Orange & yellow food coloring gel

Mix the powdered sugar, butter, and vanilla thoroughly together. Slowly add the flour to the mixture. Divide your dough into three bowls evenly. Mix orange food coloring into one bowl of dough and yellow into another. I start out with just a little amount of gel on the end of a toothpick and keep adding it in small amounts until I achieve the right color. 

Put your dough in the fridge to chill for 20 minutes. Form each bowl of dough evenly into rectangular shaped logs. Then stack the logs on top of each other and use your hands to mold it into a long pyramid of triangle shape. Wrap your pyramid with wax paper or parchment paper and freeze for several hours. 

Preheat your oven to 400* when you're ready for baking. Slice the log into pieces about 1/4 inch thick and bake in the oven for 8-10 minutes or until the edges of the cookies start to brown. These cookies will burn easily, so keep an eye on them.

Then, you'll have some super cute (non-waxy) cookies to enjoy!

Thursday, October 28, 2010

Sugar Cream Pie

Ever had sugar cream pie? It goes by many names. Old Fashioned Sugar cream pie, Hoosier sugar cream pie, Indiana cream pie, Indiana farm pie, and finger pie. Weird huh?  

P.S. I have no idea what the heck a Hoosier is. I know it is referring to a person from Indiana, but other than that, no clue. I know what a Buckeye is. A tree nut AND a person from Ohio. 


I had never heard of it until I moved to Indiana. Another weird mid-west thing I guess. 


Basically sugar cream pie is sugar and cream. Wonder of wonders. Who'd a thunk? 


I looked at a few recipes and found they are all. exactly. the same. They all used the same ingredients, heavy cream, sugar, vanilla, flour. The only difference is some add milk, some corn syrup, some cook the filling before they fill the pie.


I eventually ended up using the one below. I think it turned out well. 


I used the recipe for pie crust from this post that I originally got from this blog. This recipe makes two balls of  pie dough, I made three mini 5 inch pies from one dough ball. 


For the pie you will need:
    • 1 1/2 cups white sugar
    • 1/2 cup all-purpose flour
    • 1 cup heavy whipping cream
    • 3/4 cup whole milk
    • 1 teaspoon vanilla extract
    • 1/4 teaspoon ground nutmeg
    • 1/4 cup butter, chilled and diced


  1. Preheat oven to 450ºF.
  2. In a medium bowl, mix together sugar, flour, and cream. Add milk and vanilla, and stir until mixture is smooth. Pour into pastry shell. Sprinkle top with nutmeg and dot evenly with small chunks of butter.
  3. Bake at 450º for 15 minutes. Reduce heat to 350ºF and bake an additional 45 minutes.

original recipe found here.

Let it cool completely before you slice. It tastes amazing if you pop it in the microwave for a few seconds before eating it. 

Tuesday, October 26, 2010

Hamburger Cookie. WHAT?!?!

Ever eat a hamburger cookie? What? You don't know what a hamburger cookie is? WHELLLLLL let me tell ya! 


Are you ready for this? They are cookies, that look like hamburgers. Mind blown. 


There should be sesame seeds on the top but I didn't feel like doing a scavenger hunt at the store, so I went without it. 
My dad used to make these for us when we were little. I loved them! These are a great thing to make if you have kids, are babysitting kids, know some kids,  or are yourself a kid at heart. 
All you need  to make these are:
  • Vanilla Wafers 
  • Keebler grasshopper cookies or any other chocolate cookie
  • Vanilla frosting
  • Shredded coconut
  • Green and red food coloring 
  • Sesame seeds 
  • Honey or maple syrup
The quantities just depend on how many of these little guys you want to make. You need two vanilla waffers for every chocolate cookie. 

First you need to turn that Coconut green! And please don't leave it in a warm place for months to turn it a moldy green, we are not making penicillin here. 
Add a few drops of green food coloring to the coconut and stir it around until its green. A little goes a long way, so start with a few drops of food coloring and then add more to get the color you want. 


Then, pretend it's Christmas and you are coloring frosting for christmas cookies.
Place some white frosting in a bowl and add a few drops of yellow, and in a seperate bowl do the same with the red. Again, start with a few drops then add more to get the color you want. I had to add a lot of red and it still wasn't a red as I wanted but oh well my stomach doesn't care. 
Volla! Ketchup and Mustard!
There is some white in with the "ketchup" and "mustard" because it is going to be used to hold the bottom of the cookie to the "bottom bun".
See! Anchor that cookie to those buns! Wait......that felt a little too personal. It sort of felt like I just called myself fat....
Ok nevermind that self inflicted fat joke.
Put some of the red and yellow colored frosting on the top cookie "bun". I smeared them a little over the edge so you could see it when it was all put together.

Then all you have to do is sprinkle the coconut on top of the chocolate cookie and place both halves together. 

This is where you would brush a little bit of warm honey or syrup on the top cookie and then sprinkle on sesame seeds. But once again, I was a lazy shopper today and didn't want to go on an epic search for them that would result in me going down the same isle 50 times. Ever been to Wal-mart? Thats a lot of isles to go down that many times. 
COOKIE! HAMBURGER! COOKIE! 

I got a little bit of yellow food coloring on my finger. Please don't judge me. 

Sunday, October 24, 2010

Roasted Pumpkin Seeds

Have you carved the obligatory pumpkins for the season? If not, chances are good that you will be doing just that in the next few days. Here's a photo of one that my nephew carved this year.

Tip: If you haven't carved a pumpkin before, or if you're still trying to carve with your kitchen knife, Stop. Just stop. Then run to Target and pick up one of those pumpkin carving kits. They're cheap and the little saw that's included may save a finger or two.


I'm a huge fan of carving pumpkins. What I am not a fan of is the squishy, ewey, gooey, guts-feeling part where you have to scrape and pull the pumpkin innards out. It's kind of gross. Okay, a little more than kind of. Usually, after all of that hard work, I just throw them out in the garden. 


This year, I decided to make all of the pumpkin guts worth it and make roasted pumpkin seeds. Believe me, they seem easy to make after you spend oodles of time pulling them out of the pumpkin.

Recipe: Roasted Pumpkin Seeds
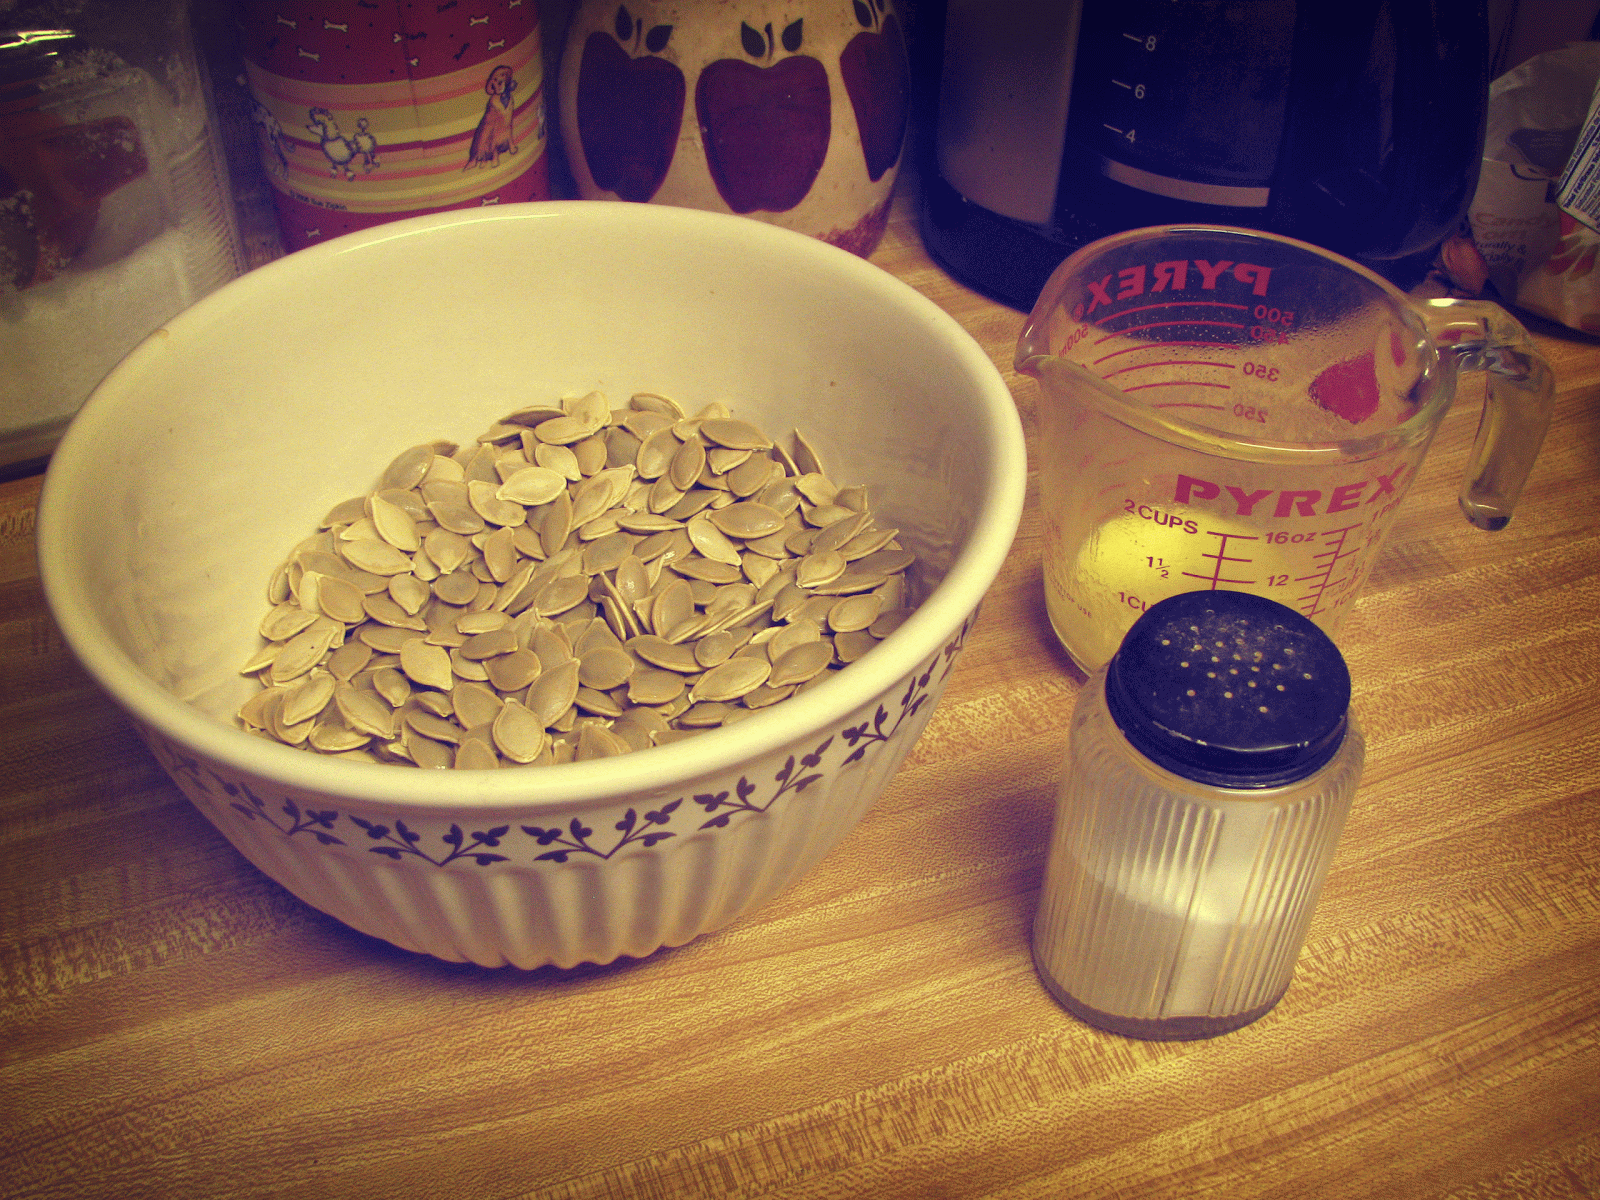
2 cups of seeds (from the guts of approximately 2 pumpkins depending on size)
2 tbsp. salt (divided into 1 tbsp. + 1 tbsp.)
1/4 cup butter, melted
1 tsp. garlic powder
 
First, you have to sort through your pumpkin guts to separate out the pumpkin seeds from the gooey mess. This is easiest to do right after you've carved your pumpkins. Then give the seeds a good rinse with water.
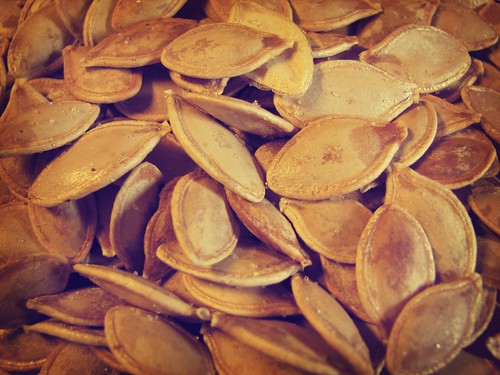
Next, you'll want to boil your pumpkin seeds in salt water (using 1 tbsp. of salt) for 20 minutes. The pumpkin seeds should look gray when you pull them out of the water (as seen in the photo above).

Once you've boiled and drained your seeds, pour them out on a baking sheet (preferably with sides to prevent them from spilling over) and place them in a safe place to dry overnight. We don't want robbers, cats, or flies to mess with them. 
The next day, your seeds should be mostly dry to the touch. Preheat your oven to 300*F. 
Then, mix the garlic powder with the butter and pour the mixture over the seeds. Toss to coat and pour your seeds out onto the baking sheet. I lined mine with parchment paper for easy cleanup. Sprinkle the rest of your salt over the seeds.
Bake your seeds at 300* for 90 minutes or until they turn a nice golden brown. Stir the seeds up on the pan every half hour so they bake evenly.

Pour into a pretty bowl and enjoy!

I think these would also be good if you flavored with with cinnamon and nutmeg. Pumpkin pie flavored pumpkin seeds. That would be interesting.

I would love to see photos of your carved pumpkins! Link them up in the comment section.

xo Nicole

Please do not eat the blankets

Ok this isn't food but a crafty thing. I tried to get Katie to write this post but she didn't wanna. Check out that grammar! Yeah!


Ok anyways...
Have you ever seen one of these? A fleece tie blanket?


I think it's a mid-west/Indiana thing because I had never heard of or seen one until I moved here. Basically It is just two pieces of fleece that have the ends cut into little strips and are used to tie the two pieces of fleece together. Pretty simple. 

You can google instruction on how to make these blankets or go here. We each got 1 1/2 yards and those made a really good size lap blanket or a great size for a kid. The grey one above is 2 yards and is big enough for me to curl under at night. 


Do you like doing good deeds? I like doing good deeds. I feel satisfied, unselfish. You feel all warm and fuzzy inside like a little light has been lit to a new you. Ha! Sorry cheesy moment over. 


Project Linus is an organization named after The Peanuts character Linus and his security blanket. Their mission statement says their goal is "...to provide love, a sense of security, warmth and comfort to children who are seriously ill, traumatized, or otherwise in need through the gifts of new, handmade blankets and afghans..."


Katie and I made several of these fleece tie blanks to donate to Project Linus. 

I made these two: 


Do you see the two monsters hugging? Cute! 


Katie made this cute one with the alligators and check out this one 


Katie was going to donate the owl one but she decided she loved it too much and had to keep it. Thats ok cause I kept one for myself too, (see the grey polk dot one at the top of the post)


If I had time I would knit a blanket but I have to turn these in on the 16 of November and there is no way I could have a blanket finished by then. If I start now I can get one in for next year!

Friday, October 22, 2010

Cookies & Creme Cupcakes

To say I like cupcakes would be a huge understatement. I love-love-love cupcakes! They are sweet, miniature cakes made with the individual in mind, that leave you feeling just a little more special. Granted, they are not at all figure friendly but they're so darn cute.

I think one of the reasons I love cupcakes so much is because they are so versatile. You can take any flavor and make it into a cupcake. After having some Oreo ice cream (during the way too hot Indiana autumn), I was inspired to make some cupcakes with Oreos. 
The recipe is fairly simple with a white cake recipe adding in some Oreos. The hardest part of this recipe is deciding how you are going to chop the Oreos for your batter. You could chop them up finely and leave yourself with a chocolate speckled white cake. I, however, went the chunky route. It was much more fun to take a bite of the cupcake and find a small chunk of cookie. 

I thought about giving the frosting a layer of Oreo dust as a garnish, but the texture was a bit too similar to sand. I decided to go with the chopped Oreos instead of pulverized Oreos.

My favorite part of the recipe is the half an oreo on the bottom of the cupcake. Trust me on this one, separate the Oreos in half and include only one side on the bottom of the cupcake liner. 

Cookies & Creme Cupcakes
Yields: approx. 2 dozen

Cupcakes:
2 1/2 cups chopped Oreos
2 cups of flour
1 tsp. baking powder
1 2/3 c. sugar
3 egg whites
1/2 c. butter - room temp
2 tsp. vanilla extract
1 c. milk
12 oreo halves

Preheat your oven for 400˚FPut your cupcake liners into the pan and place one Oreo half into each liner. Combine the flour and baking powder together in a bowl and place to the side. Then, cream together the butter and sugar. Add in the egg whites one at a time, mixing well after each addition. Then, mix in the vanilla. 

Add in half of the dry ingredients and beat the batter well. Mix in the milk and add in the rest of the dry ingredients. Then, add the chopped Oreos to the batter being careful not to mix too long. Fill each cupcake liner 2/3 full. After putting the cupcakes into the oven, turn the temperature down to 350˚F and bake for 15-18 minutes or until a toothpick inserted into the center of a cupcake comes out clean. Allow the cupcakes to cool for a few minutes and then remove them from the pan to cool the rest of the way.

Cream Cheese Frosting:
1 block (8 oz.) cream cheese
6 tbsp. butter - room temp
4 c. powdered sugar
1/2 tbsp. vanilla extract
2 tbsp. heavy cream

Blend together the cream cheese, butter, and vanilla until it creates a smooth mixture. Slowly, add in the powdered sugar until just incorporated. Add the heavy cream and beat until it's blended into the mixture. Then, beat the mixture on high for about 5 minutes until it becomes light and fluffy. Once the cupcakes are cool, top them with frosting and garnish with any leftover Oreos. 

Adapted from Annie's Eats.

I prefer my from scratch recipe, but if you're in a bind for time here's my alternate recipe for you.


Easy Peasy Recipe
1 white cake mix + ingredients listed on box
2 1/2 cups of chopped Oreos
1 can of premade frosting
Oreos to garnish


Follow the directions of the cake mix box to mix up the cake batter. Add in the chopped oreos. Scoop into cupcake liners, 2/3 full, and bake as directed on the box. Allow your cupcakes to cool and finish them off with frosting and your Oreo garnish!


Enjoy!
Related Posts Plugin for WordPress, Blogger...